If you’ve had a car for a long, you’ve probably heard of a “U-joint,” also referred to as a Universal Joint. A damaged U-joint will shorten the operating time of a car.
A broken U-joint can harm the driveshaft, brake line, transmission line, and numerous other components of the car in addition to causing transmission fluid leaking. But how long is it safe to drive with a faulty U-joint?
How long can a bad U-joint be driven with, you might be wondering. Without a properly working U-joint, certain cars won’t operate at all. Knowing how to maintain and operate universal joints properly can help you avoid paying hundreds, if not thousands, of dollars in repair costs.
It takes time for the u-joint to break; it doesn’t happen all at once. This component’s failure, if left untreated, can make driving risky as well as expensive. The good news is that your car’s u-joints may need to be repaired if you notice certain warning signs.
A Universal Joint: What Is It?
U-joints, also known as universal joints, are X-shaped parts that are typically composed of steel and have a bearing cover on either end. It permits the vehicle’s stiff driveshaft to freely rotate while connecting it to the transmission.
They are components of a mechanism created to allow the crankshaft’s rotation to transmit spinning energy to the back wheels (applicable for rear-wheel-drive vehicles).
The driveshaft can rise and fall because of the movable connection at its end. When the car is driving over uneven surfaces, it might also move at an angle to the engine.
For instance, the driveshafts of pickup trucks have u-joints at both ends. A vehicle could not construct enough suspension for any wheel travel without universal joints. Every bump and pothole would cause the driveline to catch.
Constant velocity joints, or CV joints, are standard on FWD automobiles. They perform a similar role to universal joints. You can check on YuoTube for instructive video instructions to better understand how u-joints function.
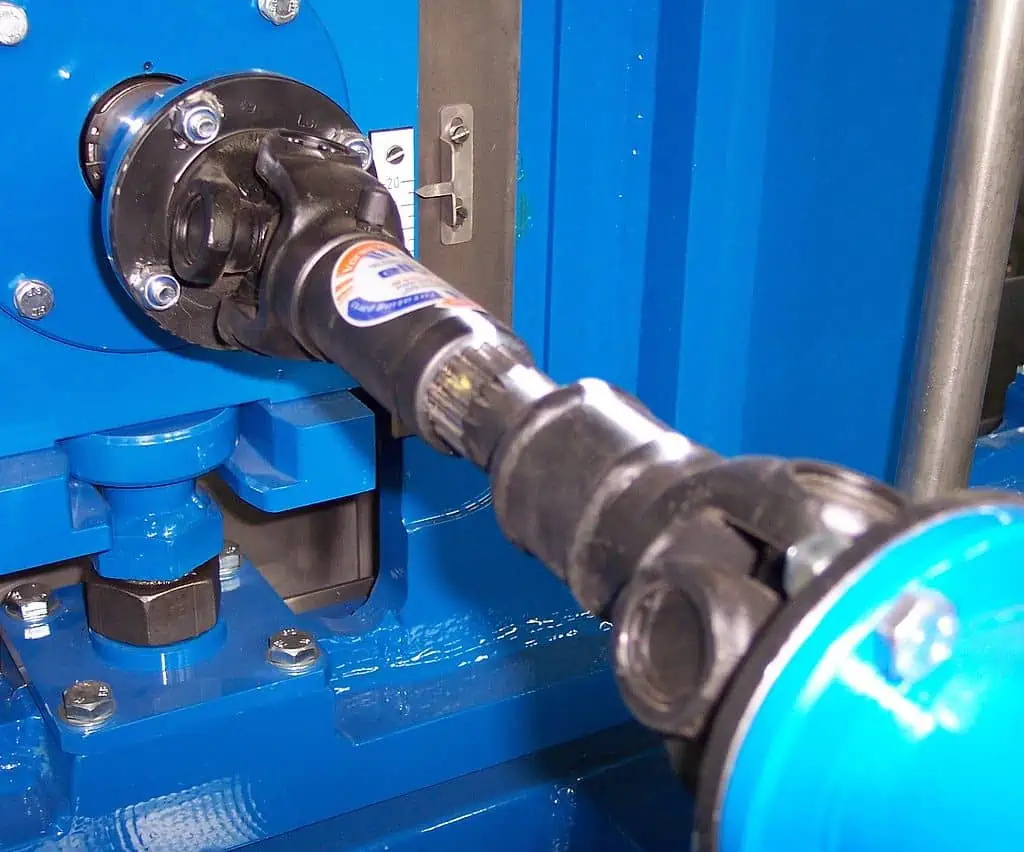
A universal joint in a driveshaft by IP83 / CC BY-SA 3.0. U-joints, sometimes called universal joints, are X-shaped components with bearing covers on either end and are commonly made of steel. It connects the rigid driveshaft of the car to the transmission while allowing it to freely rotate.
What Is the Function of a U-Joint?
Driveshafts must be able to swivel along with the suspension as the car is rotating because cars do not move on extremely level terrain. As a result, the driving wheels will always have power. The driveshaft can continue to rotate while being powered by universal joints.
A U-joint also corrects the transmission’s and the rear axle’s height mismatch. A direct driveshaft coming from the engine would not function since the rear wheels and axle of the car move independently of the other sections of the vehicle.
It would bend or bind when the car hit bumps because it was connected to the axle. The universal joints’ flexible motion during driveshaft rotation corrects the mismatch.
What are the Symptoms of a Malfunctioning U-Joint?
As we all know, practically all rear-wheel drive trucks, four-wheel drive automobiles, SUVs, and off-road vehicles like Jeep cars have a u-joint, or universal joint, attached to the driveshaft assembly.
The height mismatch of the transmission and the rear axle is corrected by the U-joints, which are found in pairs on the car’s driveshaft.
Your car’s internal systems and wheels are both under the control of the transmission, which is also responsible for ensuring that the proper amount of power is sent to them.
It operates by changing the gears in a manner very similar to that of a bicycle, so if you do not prevent chain degeneration, you may lose some fuel economy. The price of replacing a u-joint may go up if your gearbox isn’t operating properly.
Additionally, the driveshaft’s ends might shift with each revolution of the driveshaft due to the power transfer from the rear axle to the transmission, which compensates for the rear axle’s misalignment.
When you put your car in drive, the driveshaft is what converts engine rotation and torque into the movement of the vehicle.
We can examine some signs of a damaged or failing universal joint now that we understand how the u-joint functions and the variables that can affect the cost of a u-joint replacement.
1. Movement-Related Squeaking Sounds
When your car is moving, whether it is going forward or in reverse, you might hear a squeaking sound. Each u-joint and each universal joint’s bearing parts are greased at the factory, but it’s possible that they don’t have the right grease fitting to enable improved lubrication once the vehicle is in operation, which reduces the service life of the bearing joints.
Every time the driveshaft rotates, the bearing section of the u-joint twists, which can cause the grease to degrade over time and provide less lubrication.
The bearing becomes dry and increases friction as a result of the metal-to-metal contact if the grease wears down over time, evaporates, or is ejected out of the bearing cup. As a result, the drive shaft’s rotation during operation may cause the u-joint bearings to squeak, increasing the overall cost of u-joint replacement.
The squeak will typically be quieter than what you might hear from your car’s other mechanisms when the vehicle accelerates and increases quicker than 5 to 10 miles per hour due to other vehicle noise.
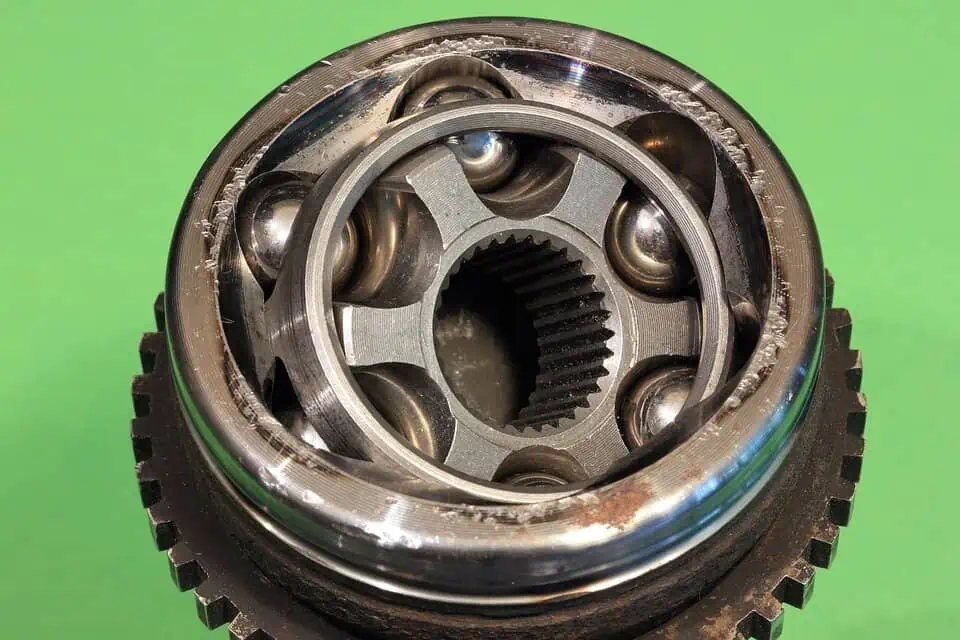
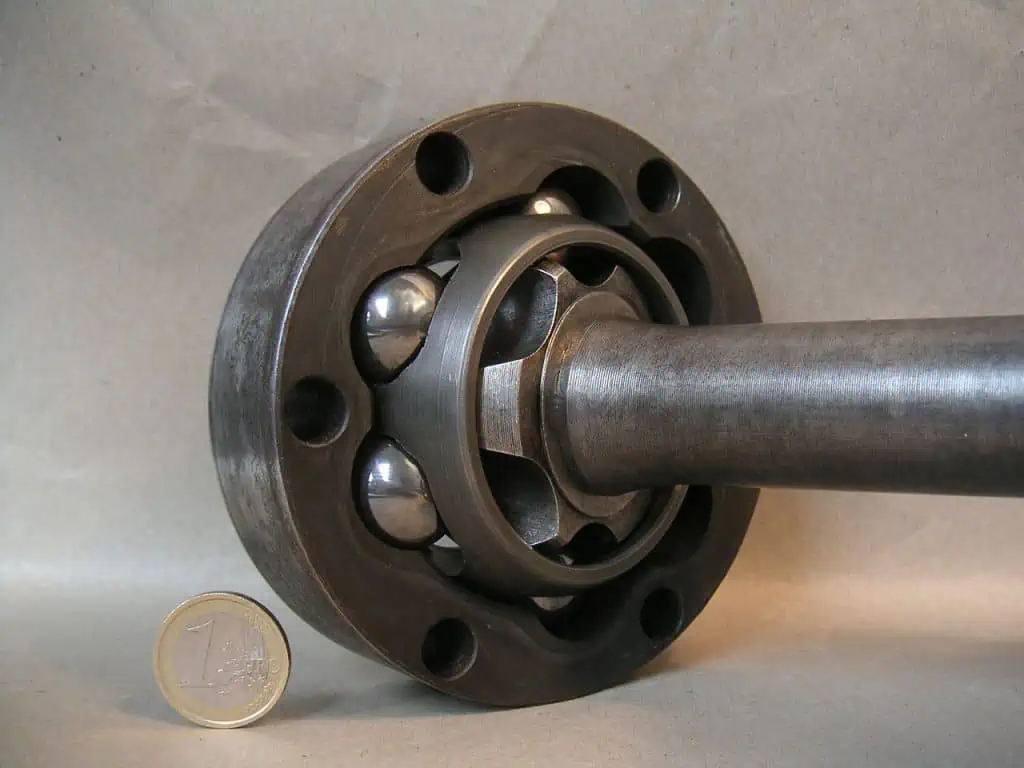
The constant velocity CV joint. On FWD cars, constant velocity joints, or CV joints, are commonplace. They serve the same purpose as universal joints.
The squeak is merely a symptom and warning indication that the u-joint needs to be serviced by a qualified mechanic.
2. When Shifting, a “Clunk” Sound Is Heard
When changing from drive to reverse in your car, if you hear a clunk followed by a loud ringing sound, this typically indicates that the u-joint bearings have enough room to allow the driveshaft to revolve slowly before coming to a hard stop when the power is reversed. The entire cost of replacing a u-joint may go up as a result.
This could be the subsequent stage of the deterioration, which ordinarily follows a lack of grease that would otherwise lubricate the u-joint bearings and hasten their replacement.
Greasing or maintaining the u-joint bearings won’t repair the damage to the joint, but they can help the joint last longer.
3. Vibrations Can Be Heard When Traveling at High Speed
The vibration you experience in your car may indicate that the bearings between the u-joints have worn out, which has given the driveshaft the ability to move away from the typical rotational path. This could result in a more expensive u-joint repair cost.
Unbalance and excessive vibration might result from this movement, which occurs outside of the area where it should ordinarily be revolving.
The drive shaft may turn more quickly than the wheels, sometimes by a factor of three to four, as a result of the higher frequency vibration in your car and incorrect wheel balancing and tire rotation.
The transmission is one of the crucial components of the car’s internal workings that are currently being harmed and broken down by the worn-out u-joint. The cost of replacing a u-joint can go up if the gearbox breaks down.
There are certain indicators that your transmission is not functioning properly that can help you determine if you need a transmission repair that may be required because of the u-joint malfunction.
The first issue you can experience is changing gears. This can be identified by the car hesitantly moving into gear, dropping out of gear, shifting gears randomly, and jerking while doing so.
Additionally, when shifting gears, there is shaking in vehicles with automatic gearboxes and grinding in vehicles with manual transmissions.
Additionally, you might hear odd noises and whines coming from your car, which can be heard when the car starts buzzing or clunking, especially when it is neutral.
A burnt and murky transmission fluid that appears black and opaque rather than the fluid having a bright red hue are additional vital symptoms of a transmission replacement that could affect the cost of a new u-joint.
A burning smell that results from excessive friction and heat buildup may be present in addition to this. Leaking transmission fluid is now a major indicator that the transmission may require maintenance or replacement.
4. Leaking Transmission Fluid
As previously noted, the transmission fluid seeping from the back of the transmission is a symptom that the transmission is malfunctioning and needs to be replaced or repaired.
The Rzeppa CV joint by Nutzdatenbegleiter / CC BY-SA 3.0. FWD cars typically use constant velocity joints or CV joints. Similar to universal joints, they serve the same purpose.
A faulty transmission that is deteriorating or broken may increase the expense of replacing the u-joint. This frequently happens as a result of a universal joint that has been severely worn and deteriorated over time.
The output shaft seal has been harmed by the vibration indicated, wearing down its ability to protect the transmission fluid and damaging the tail shaft of the transmission. The transmission should be examined to identify the leak’s source if fluid leakage is detected.
Transmission fluid leaks have several common causes, and the typical repair price is. There are additional causes of the transmission fluid leak in addition to the price of replacing the u-joint.
Damage to the transmission pan or drain plug is one of the other causes. Your transmission pan will deteriorate and wear out over time, and the loose rocks and other road debris make the pan vulnerable to harm.
Seals are additionally broken. Although seals in an automated gearbox can maintain hydraulic pressure, with time these scars can deteriorate and crack, resulting in leaks in the transmission. A transmission pan gasket may also deteriorate with time or as a result of faulty construction.
The torque converter leakage—which denotes that the torque pump has a crack and may leak transmission fluid, as well as the fluid line—means that the fluid line is cracked, which can increase the cost of replacing the u-joint.
A transmission fluid leak’s overall repair cost, which can lower the ultimate cost of a joint replacement, is between $150 and $200.
You can typically use the services of replacing pan nuts, drain plugs, seals, gaskets, and fluid lines for this mount. By replacing these components, you can lengthen the lifespan of universal joints and reduce the cost of u-joint replacement.
5. A Dislocated Drive Shaft
This is the glaring indicator and symptom of the ultimate universal joint failure mode and the primary cause of the disproportionately high cost of joint replacement.
The driveshaft will drop to the pavement and lose its ability to transmit power if the u-joint fractures and the driveshaft dislocates.
At this point, a repair may call for a complete driveshaft replacement and involve much more than just replacing or fixing the universal joint.
The overall cost of replacing a u-joint can be greatly impacted by the cost of replacing the drive shaft. Depending on the model, year, and make of your car, sample prices for the driveshaft replacement may change.
How Long Can You Keep Driving on a Bad U-Joint?
The truth is that you shouldn’t drive with a malfunctioning u-joint, even though you might not want to pay for a joint replacement cost to keep your car operating at peak performance.
Squeaking, noise, or improper operation of the u-joint are all clear indications that they are failing and are damaged.
The u-joint is failing if you notice a chirping and vibration emanating from it that changes in intensity each time your automobile travels over bumps on an uneven road. As a result, you need to calculate the total cost of replacing the u-joint.
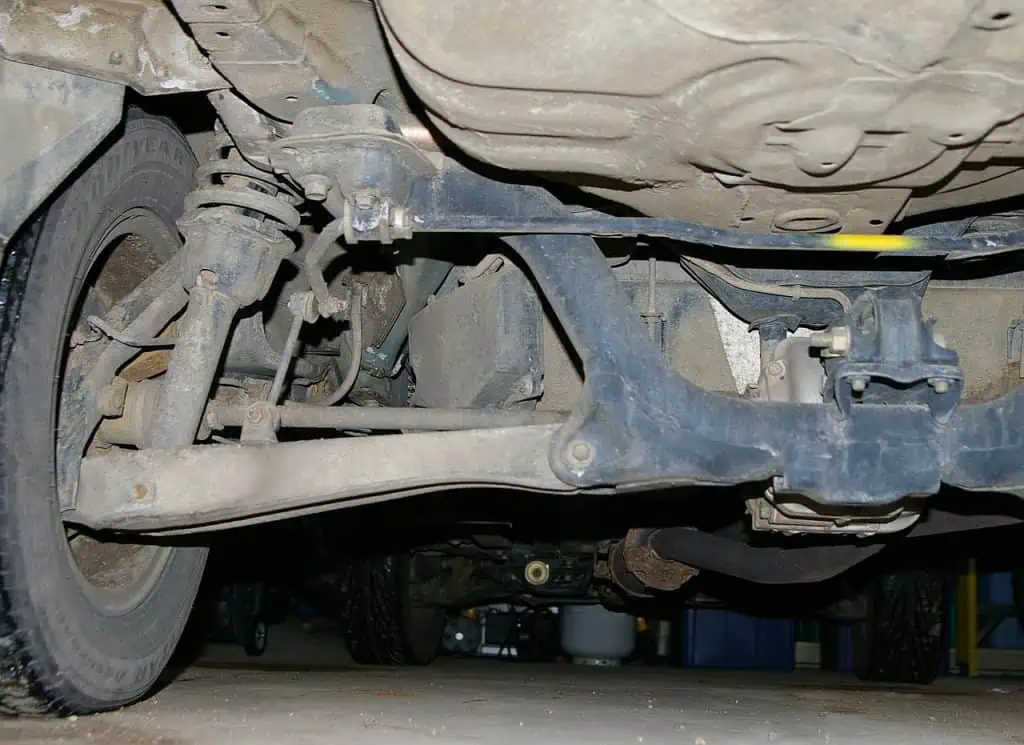
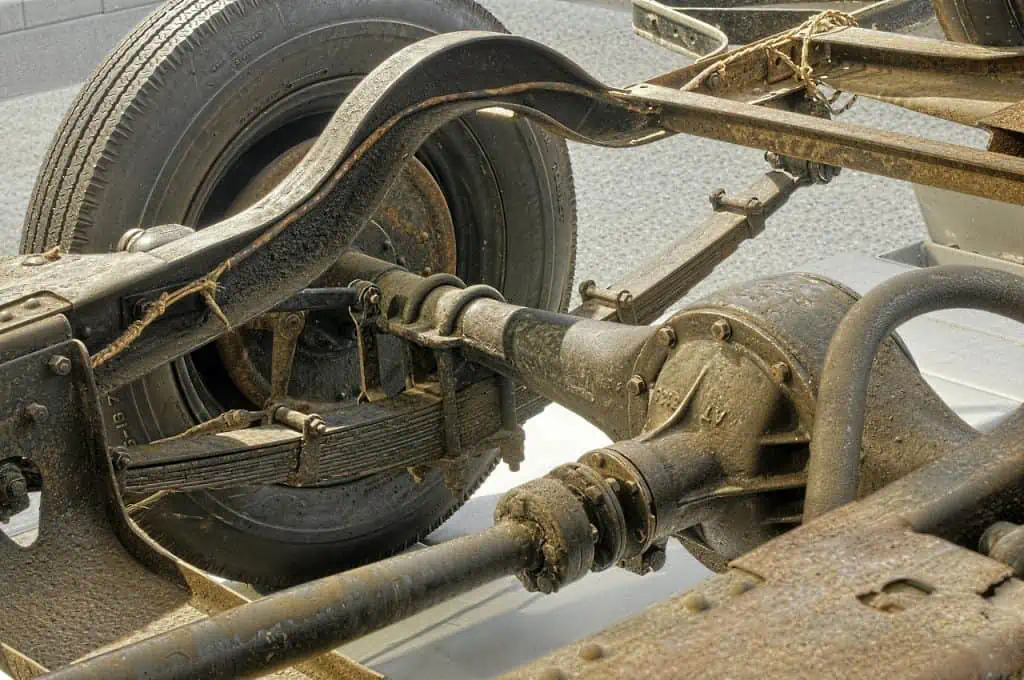
A multi-link type rear independent suspension on an AWD car by Hustvedt / CC BY-SA 3.0. Cars do not move on very level terrain, so driveshafts must be able to swivel along with the suspension as the car rotates. The driving wheels will therefore constantly be powered. Universal joints can be used to power the driveshaft while it is still rotating.
The drive shaft may create loud clanking noises while you’re driving as the issue worsens, especially when the car is in reverse or the driver.
As a result of vibrations and wobbling, seals on the transmission tail shaft will also eventually break and begin to leak.
The u-joint may bind and shatter when it has completely failed and needs to be replaced, which would allow the drive shaft to fall off the car while it is moving.
What are the Main Causes of U-Joint Failure?
Every part of the car, not only the U-joint, suffers from normal wear and tear over time. The universal joint can have reached the end of its useful life after serving the prescribed amount of time.
However, the majority of the time, the issue might be attributed to poor driving, a lack of grease in the bearing, or vehicle modifications that can alter the speed or angle of the driveshaft.
It is simple to find a fix for a broken U-joint if you can identify the problem. Some of the most frequent causes of universal joints failing are as follows:
1. Common Wear and Tear
Although U-joints are made to last a long time, anything mechanical is prone to failure no matter how carefully it is maintained. The universal joints may wear out sooner than anticipated in poor driving conditions, while driving aggressively, and after a certain number of miles.
The U-joints in SUVs and trucks that are used primarily for hauling, off-road driving, or both require extra maintenance. As a result, they require replacement more frequently than a normal drive would.
It is preferable to swap out the original universal joint with an OEM alternative if it gave good mileage.
2. Grease Loss
As has been stated numerous times before, U-joints suffer from a lack of lubrication. Since they are merely a series of bearings, they must have the proper chassis oil to operate at their best.
In elevated, off-road, or heavy-duty cars, a few U-joints are designed to get lubrication maintenance, which can be quite beneficial.
Fortunately, “greasable” U-joints are available for the majority of automobiles. It facilitates simple grease maintenance.
3. Too Much Strain Through Very Heavy Duty
Extreme driving practices like off-roading, racing, or continuous weight towing will put additional strain on the driveshaft and hasten the U-deterioration. joint’s
It’s crucial to purchase heavy-duty u-joints that pair with vehicles that need to move hefty weights regularly.
4. Lift Without Alignment
The driveshaft’s angle may alter if a raise kit is installed in the car; this would put extra pressure on the U-joints and shorten their lifespan.
After lifting, check the driveshaft alignment to make sure it is operating within specifications. Driveshaft angle requirements must be met; alter as necessary. Plus, it’s generally a good idea to have a stronger universal joint.
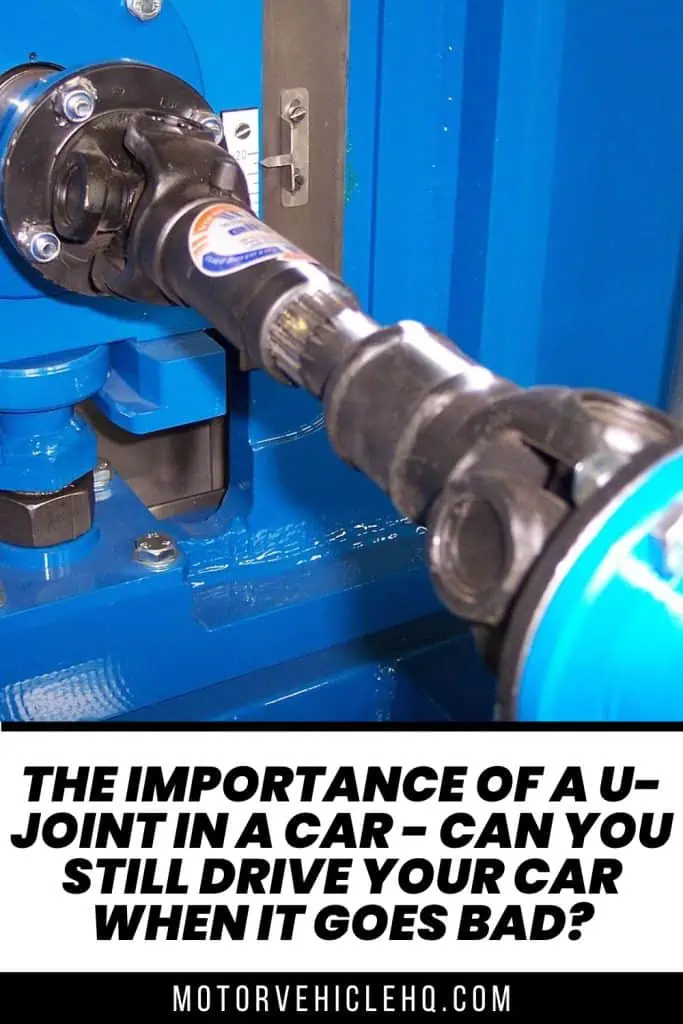
An automotive driveshaft by Ralf Roletschek / CC BY 3.0. The driveshaft will drop to the pavement and lose its ability to transmit power if the u-joint fractures and the driveshaft dislocates.
5. A Souped-Up Engine
Added upgrades or a larger engine to your car to increase horsepower? Remember that you will also be putting more pressure on the driveshaft and the U-joints.
The U-joints for cars with higher horsepower requirements must be just as robust.
How Often Should U-Joints Be Replaced?
U-joints theoretically last a lifetime because that is how they were created. They are not designed to lose value over time, yet it does. U-joints could also shatter; this is a common occurrence.
Some auto parts, like shocks, have a service life that is rather simple to forecast. But with U-joints, that is not the case. Even though the car is brand new, universal joints might still break. Every time you replace your oil, inspect the universal joints.
A typical rear-wheel-drive car has two to three U joints. Buses and other vehicles with larger wheelbases typically have three or more U-joints. The likelihood of failure increases with the number of U-joints.
How Can I Diagnose a Bad U-Joint?
It is a good habit to frequently check the U-joints rather than waiting for something to break before fixing it. Get them examined twice a year, if not more frequently, if not at every oil change.
Step 1
Listen closely while the car moves and attempt to hear any metallic or squeaky sounds coming from underneath. These kinds of noises typically indicate a universal joint that is either under-greased or dried out.
Step 2
When a joint is on the verge of failing, vibrations begin to occur. Do not dismiss the vibrations that you feel.
Step 3
Stop in a secure area, such as a driveway or a parking lot. Keep the engine running and the brake pedal depressed. Put your car in park and change to reverse. During the procedure, you ought to hear a pounding or clunking sound. If you experience a sudden jump along with the music, a shaky universal joint is a cause.
Step 4
Turn off the engine and park the car on a level surface. Try to move the driveshaft while keeping the wheels chocked in the park. Turn it slowly while noting any U-joint reactions. The driveshaft can rotate up to 14 to 12″ in any direction when turned by loose joints.
Step 5
To connect the driveshaft to the differential or gearbox yoke, use a large, flat screwdriver within the yoke. Now, rotate the shaft by raising and lowering the screwdriver. Keep an eye out for any driveshaft motions that might point to a loose U-joint.
Use a flashlight to check the U-joints. Keep an eye out for retaining clips in the yokes, rust, missing bearings, or damaged or chipped bearing caps.
A Guide for Replacing a U-Joint Step By Step
Although you might be tempted to see how long you can drive with a damaged U-joint, it is strongly advised that you repair it.
The driveshaft can rise and fall because of the movable connection at its end. When the car is driving over uneven surfaces, it might also move at an angle to the engine.
You Will Need the Following Tools
- A Jack
- Two jack stands
- The wrenches of 7/16 or ½”
- A ratchet and a socket of 7/16 or ½”
- A hammer
- A ⅝” heavy-duty metal billet or a socket
- The ear protection gear
- The new replacement U-joint
- The snap ring pliers
- A grease cartridge
- A grease gun
- The u-joint tool or ball joint tool for an alternative method
The No U-Joint Tools Process
Let’s now see how it can be processed without the need for a U-Joint tool.
Step 1
Lift the vehicle into the air, either level or with the front portion lower than the back. This will halt the transmission’s fluid leak. The amount of bolts required to attach the rear yoke to the differential yoke varies based on the make, model, and year of the vehicle and might be either 2 nuts and bolts or 4 bolts.
Generally, these are 7/16” or ½”. The driveshaft can be removed after being removed by moving it forward, down, then once more backward.
Step 2
Use a hammer to strike the yoke to release any strain on the snap ring or C clip. Different types of tension are applied in different directions to the snap rings. Strike the yoke assembly or U-joint forcefully while holding it by the joint cups.
To remove the outer C-clip/snap ring from the lower cup or the inner snap ring from the top portion of the yoke, use a set of pliers. To remove the two snap rings or C-clips, repeat the procedure on the opposite side.
Step 3
Squeeze the bearing cups outside the toke using a press, a powerful socket, or a hammer and punch. The driving shaft should be rotated 180 degrees. On the opposite side, repeat.
Several heavy-duty yokes have bearing cups mounted on both sides. Here’s a pro tip. Do steps 2 and 3 for the second yoke as well if it applies to you.
You must handle the driveshaft very carefully throughout the entire process. The driveshaft is kept relatively light by manufacturers to reduce the overall weight of the car, but it is readily dented.
Unbalanced driveshafts include those with dents. Then you will need to cope with an entirely new vibration source.
Step 4
Attach the two opposing bearing cups to the new joint with tape or a rubber band. Remove the 2 more caps at the same time, then insert the polished end of the U-joint into the yoke’s apertures.
Place a bearing cup beneath one of these apertures and tap the yoke lightly. Use a hammer to attach the yoke once the cup is securely in place. On the opposite side, repeat the installation of the snap ring/C-slip.
Step 5
Check the installed joint for binding. It might need to be correctly tapped to release the binding.
Step 6
You will have to slide underneath your car to complete this part. Till it bottoms out, insert the driveshaft’s transmission end into the tail shaft. Lift the driveshaft’s tail at the differential end and position it there.
Step 7
Set the joint cups into the pinion yoke of the differential after removing the rubber band or tape. To tighten the bolts and nuts and to clamp the U-joint to the yoke, install the clamps. To secure them in position, attach the snap rings or C-clips.
Step 8
Start the engine after lowering the car to the ground and listen for any drive shaft or U-joint clunking.
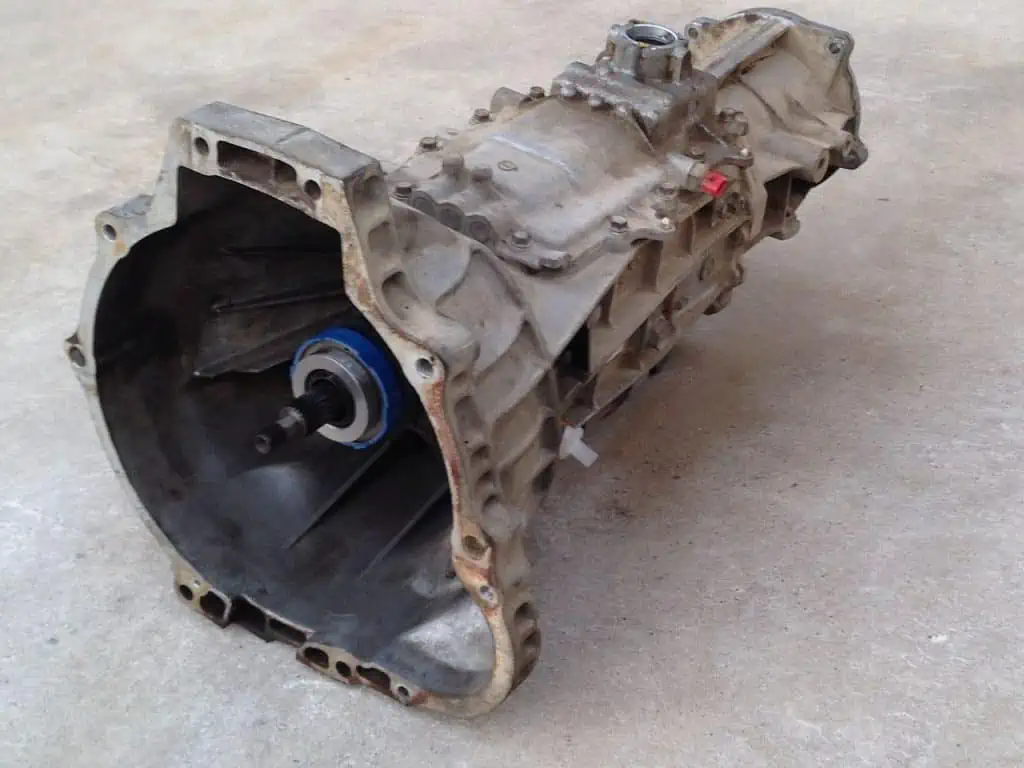
An automotive transmission by Typhoon / CC BY-SA 3.0. A faulty transmission that is deteriorating or broken may increase the expense of replacing the u-joint. This frequently happens as a result of a universal joint that has been severely worn and deteriorated over time.
The Action Using U-Joint Tools
Let’s now talk about processing using a U-Joint tool.
Step 1
Mark the driveshaft and yoke sides where the new U-joint replacement will be placed. Place the driveshaft of the car on any suitable work surface after taking it out.
Step 2
Position the press cup on top of the threaded rod by determining the correct size for the driveshaft yoke. Obtain a second cup that is larger than the U-joint cups but smaller than the yoke’s aperture.
Step 3
Against the yoke, place the U-joint tool. With your hand, hold the threaded rod securely. The snap rings or C-clips will hold the caps in place when removed. Before turning the press around to extract the second clip, you might need to release the tension in one of the clips.
Step 4
To remove one cap from the yoke, tighten the threaded rod once more. Remove the opposite cap and the “cross” of the U-joint by turning the tool around and repeating the procedure. Maintaining a 90-degree angle between the cross and the yoke will make the operation a little bit simpler.
Step 5
Using tape or a rubber band, fasten the caps to the newly formed junction. Inside the yoke, insert the cross. Slide the new cap into the yoke as far as you can and push the lever to one. Set the tool to slip the cap inside while the threaded rod’s end is up against the cap.
Step 6
Till the cap is suitably seated against the yoke, depress the threaded rod. Repeat the same on the other side after removing the tool and flipping it. Make sure the joints can pivot easily.
Step 7
The transmission yoke should be pushed into the tail shift by going underneath the car. Install the latch, the flanges, and/or the straps by raising the back of the shaft into position and ensuring that it aligns with the previously produced marks.
NOTE: It’s important to deal with a bad U-joint as soon as you think that the part might be having issues. The driveshaft can fall out of the underside due to a completely failing universal joint, seriously damaging the automobile and possibly leading to an accident.
How Much Does the U-Joint Replacement Cost?
U-joints are often replaceable components that don’t require a complete driveshaft replacement. Depending on the vehicle’s make, model, and year as well as the severity of the damage, you should prepare to pay anywhere between $200 and $450 for professional assistance with your U-joint replacement.
By performing the replacement yourself, you can save money. It takes no more than an hour and a half and is quite simple. A replacement U-joint costs less than $50.
The Conclusion
Always pay attention to the warnings your automobile is sending you, especially if they seem to be connected to a bad U-joint. Deal with the issue immediately to avoid a possibly crippling financial burden. You can estimate how long you can drive with a bad U-joint by knowing the state of your car’s components.
Checking for transmission leaks is required. Although lubricants might lengthen a U-useful joint’s life, you could eventually need to replace it.

Jim Wicks is the founder of MotorVehicleHQ. With over two decades of experience in the automotive industry and a degree in Automotive Technology, Jim is a certified car expert who has worked in various roles ranging from a mechanic, car dealership manager, to a racing car driver. He has owned more than 20 cars over the past 15 years. Ask him about any vehicle you see on the road and he can tell you the make, model and year. He loves the aesthetics of all things cars, and keeps his vehicles in pristine condition.
In his free time, Jim enjoys getting his hands dirty under the hood of a classic car or taking long drives along the country roads. His favorite car? A 1967 Shelby GT500, a true classic that, according to Jim, “represents the pure essence of American muscle.”
